
[photo via For Me, For You]
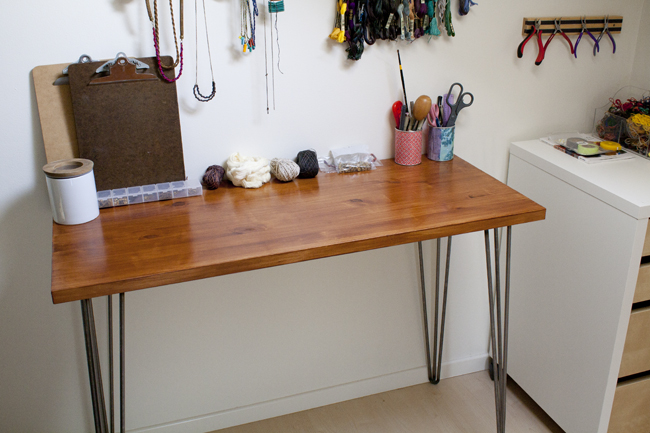
Ever since March of last year I've been inspired by this DIY desk by Kate Miss. She bought a piece of wood, sanded it, stained it, and added raw steel hairpin legs. Later that fall she did the same thing for a dining room table.
Empowered by my recent Citristrip adventures, I decided it was high time that I tried something like this too. I confidently walked into a local lumber shop to inquire about getting a 42" round of oak hardwood cut for the table. KM wrote that her piece was about $20, but mine was going to be $60 for the full sheet of wood (oak doesn't come in half sheets there, of course) and another $40 for the cut. Egads! I drove to Lowe's.
I knew Lowe's wouldn't do a circular cut, so I opted for a sheet of maple ($45) and Lowe's made the rectangular cuts for free. The dining table cut was 3' x 5' leaving me with a 3'x3' square (card/craft table?), 5'x1' rectangle (entry table?) and 3'x1' rectangle (no piece left behind when you have to pay for the full sheet).
Though I posted our old table on Craigslist, I am under strict instructions from Chris not to sell it until our new table is complete. It actually is pretty handy because I set the new table part on top for easy sanding and staining. While at Lowe's I also picked up some trim to glue on the sides to make more of a smooth finish after the slightly rougher cuts from Lowe's saw.

First I glued the trim to the edges to make it look a little more finished. I didn't have any clamps so I used tape to hold it in place while it dried.

Voila! Fancy plain trim.

Then I sanded the entire piece with 220 grit sandpaper (using my new sander for the first time!). I had leftover tack cloth in the closet to pick up all the tiny wooden specs left over.

I stained it with Minwax Polyshades in Antique Walnut. I started in the middle, worked out, then across - a technique I would not recommend. Trying to test it out in the least conspicuous area, I ended up making it a bit splotchy. The second half was much better, but it's the bottom of the table so no one will notice the flaws.

After it dried for a day, I lightly sanded it with 0000 steel wool (had to go back to Lowe's for that) before applying a second coat.

Bottom done! I'll flip the piece over this weekend and have a go at the real side.
Time for you to quit your job and open a DIY shop. Is that an oxymoron?
ReplyDelete